Templating my bird sculptures
The back of my American Goldfinch female bird made from crepe paper and wool.
Creating a sustainable creative process so I can run a sustainable art business.
DISCLOSURE — When you click on my affiliate links, I may earn a commission for qualifying purchases made through Amazon.com links in this post. This commission goes directly into the maintenance of my website, the technology that goes into my courses, and my art. Want to know more? Read my AMAZON AFFILIATE DISCLAIMER.
I've had a lot of interest from my Collectors about my paper-wool birds and I'm so excited about it! When I first started making my birds, it was out of curiosity, which then morphed into a whole new sphere of thought and imagination.
Now, I'm at a point where I'm ready to find a sustainable way of making my birds that doesn't require 3 hours of time making a bird skeleton from scratch. Kudos to Diane Beltran Herrera for making a bespoke bird skeleton every single time for years (although I noticed she recently started templating the skeleton of her birds as well). Having taken a pattern making course at a local college 10+ years ago, I have some experience in turning a 3 dimensional piece into something flat. But I wasn't completely prepared for making a template that's so small (oh the head!).
Left: Constructing the bird skeleton with thin paper strips. Middle: Paper mockup of my bird with the slits going perpendicular to the body. Right: Paper mockup of my bird with the slits going vertical along the body.
I first created a skeleton of a song bird using Diane's technique of thin lengths of card stock. Then I cut it up. I cut the head and body into two sections and divided and cut each body part into two symmetrical pieces through the middle. I surmised I had two opportunities to get it right - using one side first, and then the other side if necessary. I cut slits into each of the pieces and then laid them down on a piece of paper to trace. Any part of it that didn't lie flat required another slit. I traced it out and added tabs to connect the slits. The initial drafts were all by pencil and paper, simply tracing and retracing. Then I'd assemble the template (using copy paper as it is more pliable and easier to glue together) and make adjustments to the working template.
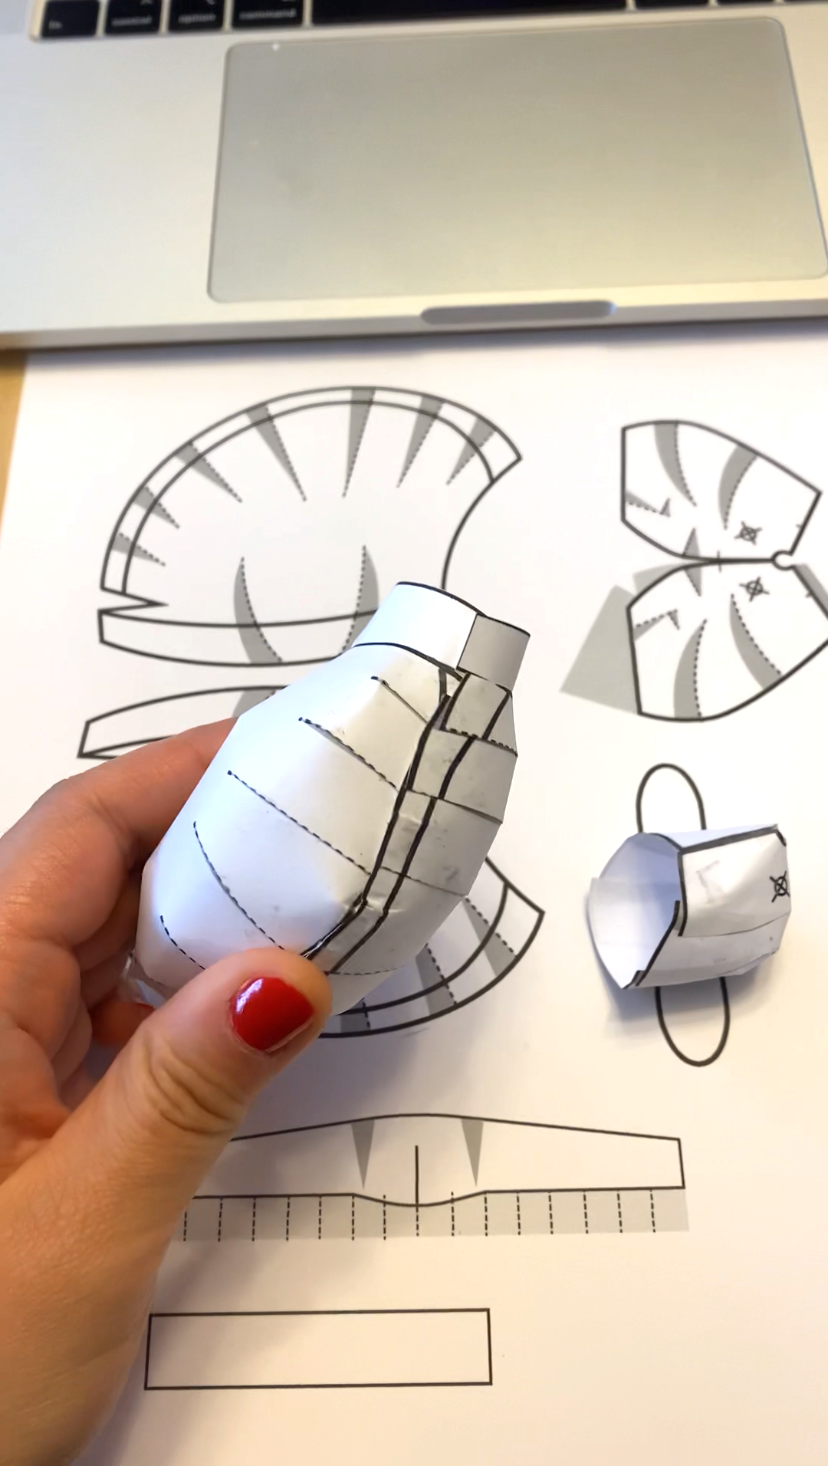
Computer printout of my working template and assembled template.
After 3-4 mockups, I was satisfied with most of the results. I scanned the pencil-drawn templates and re-drew them in Illustrator so I could print out the working templates instead tracing them.
The trickiest part was making the head. I did a pretty decent job at my first go, however, I still wanted more defined areas on the head. Thanks to many of you who DM'd me on Instagram, I referred to Johan Scherft's intricate bird templates for additional guidance. I had come across his work years before and never thought that my work would in any way end up being related to his. Where the curve was deeper, he had made a slit within a slit, and using that idea, I was able to refine my bird head further. However, because my template would be used under all of the wool and paper, I decided not to spend too much time refining the shape as any adjustments could be made with the wool and paper.
One of the toughest part of my original process was changing the positioning of the head. I would cut the head off the body, then position it where it would sort of float on top of the body, then connect the head and body using the thin strips. I found this incredibly cumbersome. So when making this skeleton template, I decided to add a higher neck piece to my body so that I could move the head around the neck and easily change the head’s positioning. Fingers crossed this will work.
Paper bird template with adjustable head.
Afterwards, I worked and reworked the positioning of the eyes and refined the chin and beak area. I finished by marking off the positioning of the wings and marked off where the legs would be attached. I know that I may want to reinforce this skeleton with paper stuffing or additional pieces of card board. I may even have to address its centre of gravity. We shall see once I actually test it out. I’m hoping if this works, I can simply tweak the template to make different sized-birds.
In the meantime, I’m back at finalizing the curriculum for my pansy online course, so this final process will have to wait a few weeks longer.


