Making custom storage boxes for my bird and moth sculptures
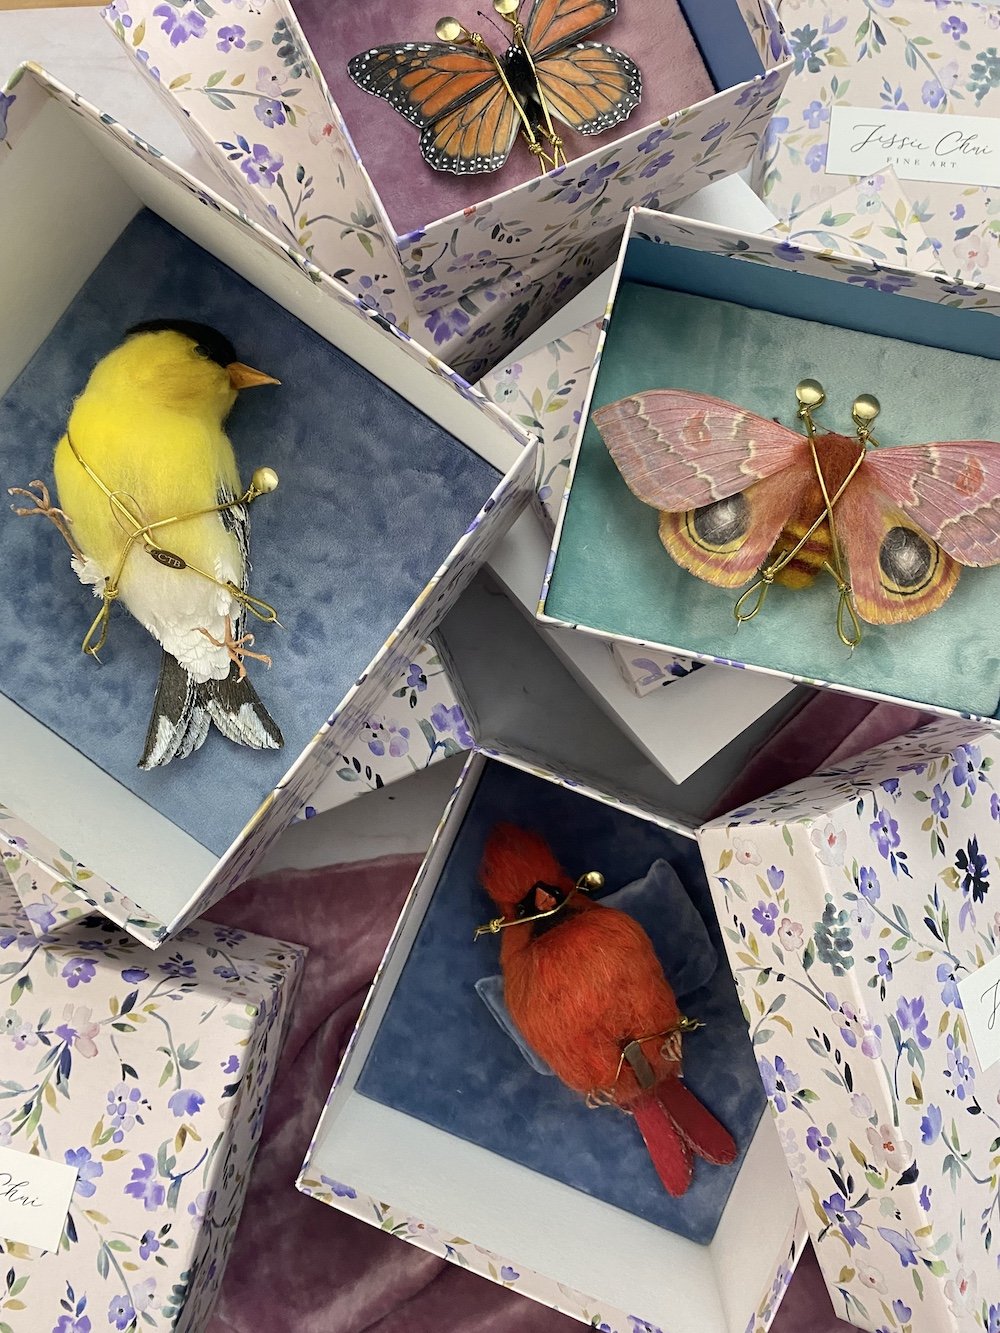
Paper & wool birds and moth in their custom storage boxes
Re-examining my paper pansies after a lengthy period of time away has given me a new perspective in my re-imagining of these exquisite flowers known as pansies and violas.
DISCLOSURE — When you click on my affiliate links, I may earn a commission for qualifying purchases made through Amazon.com links in this post. This commission goes directly into the maintenance of my website, the technology that goes into my courses, and my art. Want to know more? Read my AMAZON AFFILIATE DISCLAIMER.
This was the first time that I offered custom storage boxes for my creations. The birds and the moths were so personal and precious to me. Since the birds were originally made for Christmas, I expected them to be displayed for a short period of time and then stored for the rest of the year. Hence, I wanted to create a beautiful storage solution that would secure them for years to come. However, I didn’t want just any kind of box. I wanted one that would raise to the sophistication of my creations. I needed boxes that elevated, and not diminish, the perceived value of my work.
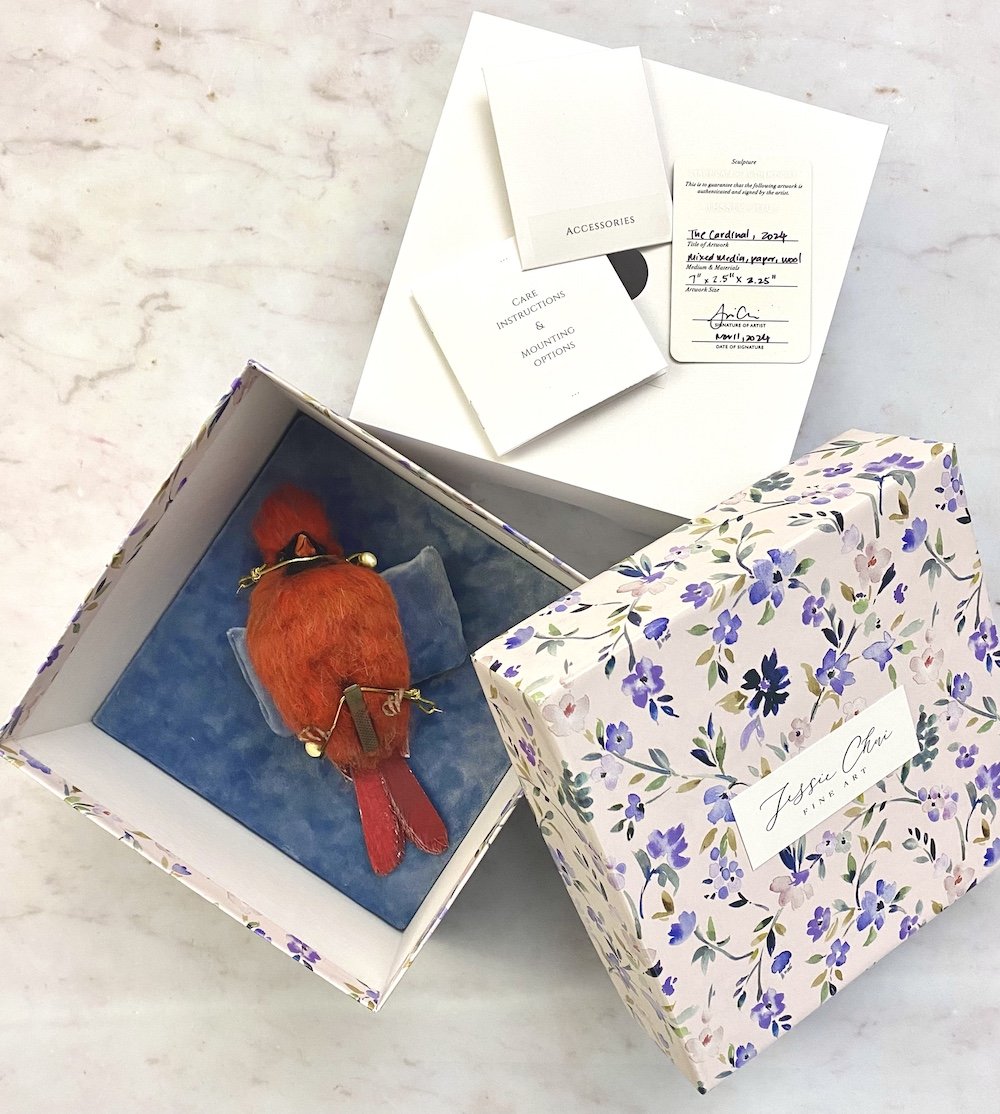
Paper and Wool cardinal in custom storage box with platform.
I first had to source boxes. I looked into printed custom boxes and I couldn’t find a printer that would make boxes in this limited quantity. I also knew that I needed very custom bottoms for the boxes to secure the sculptures.
So I had to customize them myself. This was more difficult than it seems because I needed a particular size - one not too big and not too small. I ended up sourcing rigid boxes with lids from Dollar Tree (!) as they had the right size. I removed the sparkly paper around it, which was a chore in itself. Once the box was cleared of patterns, I covered it with a thick luxurious gift wrap with a watercolour floral pattern. Initially I just used tacky glue, but it created bubbles between the wrapping and the box, so I leaned into my school days in graphic design and went with on good o'l rubber cement. After gluing a few boxes, I was dizzy from the fumes, so I had to space out how many I glued on at a time.
I created templates of the boxes so I could just cut again and again instead of having to measure out the wrapping every time I wrapped a box. I had quite a number of boxes to make.
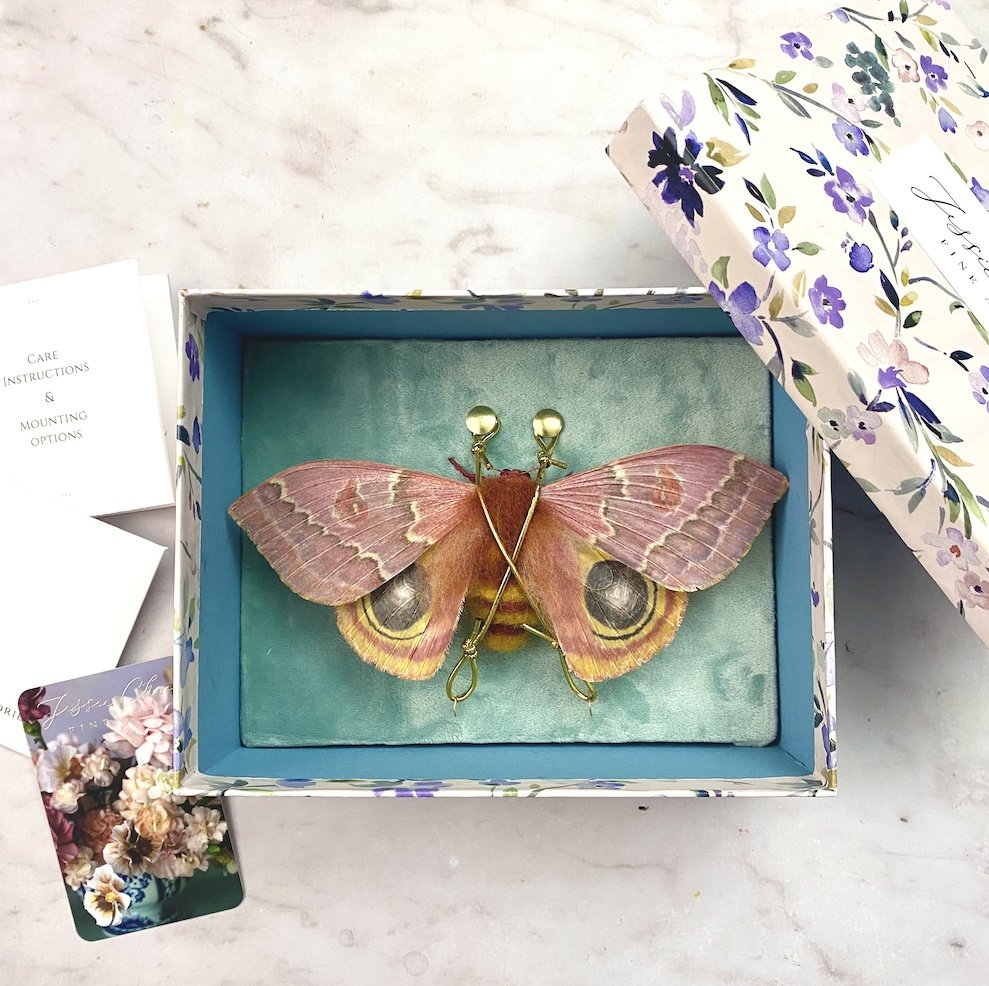
For the bottom of the box, I wanted something thick and luxurious, so I wrapped velvet fabric around foam core and then punched and secured the gold wire or pin into the board to create hooks and attachments. I wanted to make sure the birds could be re-secured as these were meant to serve as long-term storage boxes for the birds and moths when not being displayed, so I attached stretchy gold string to board that could be hooked to secure the sculpture and unhooked when the sculpture was to be removed. For the birds, I also made small pillows for their backs to preserve their shape while in storage and during shipping. I cut a rectangle piece of velvet and sewed the edges inside out, then filled it with stuffing from an old pillow. After positioning the bird on the board, I glued the pillow down. I chose not to glue down the bottom so that in case, in the future, the wires or pins became unattached, the bottom could be pulled out and the work redone.
There were a few items I wanted to include with the birds and moths. I put together a small booklet with Care Instructions and Mounting Instructions as there were multiple ways that the sculptures could be mounted (hung, clipped etc.). I also made small envelopes to place the ribbon, pin and clip for each box. Lastly, each creation had its own Certificate of Authenticity. I wanted all of these included within the box so that none would be separated during storage.
To this end, I designed a table-like platform to fit within each box where these items could be placed on top of the platform, separating the sculpture from the items. I designed the platforms in Illustrator and then used my Cricut to cut them out. After a few hours experimenting with different designs and different weights of paper, I ended up using artist mixed media paper from a pad. I printed out labels to be stuck on the platforms so that you would know what sculpture was in the box by opening up the lid.
Finally, I added my name and branding on the top of the box. Since it was such a small quantity, I simply used business cards trimmed to size and positioned and glued on the centre of the box lid.
Honestly, making the custom boxes was an entire creative process in itself. It was a lot of work - hours of work. However, I think the results were well worth it. They look luxurious and professional and everyone commented on how beautiful they are.


